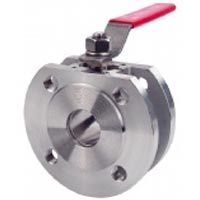
(1) Precautions before disassembling the floating ball valve
For safety, the following items must be noted before the valve is removed from the pipeline or disassembled:
① When disassembling the valve, keep your hands away from the inner cavity of the valve. The remotely operated valve will be closed at any time to injure the operator.
②You should understand the medium in the pipeline, and if you have any questions, you can check with the relevant personnel.
③ Wear protective clothing or appropriate equipment when contacting media.
④When the valve and pipeline are depressurized, open the valve before removing the valve from the pipeline to drain the pressure that may be left in the valve and keep the valve in the open position. After removing the valve and before disassembling, place the valve vertically and open and close the valve repeatedly to drain the residual medium.
⑤Rated value of sealing seat and valve body one-the safe and correct use of this type of valve mainly depends on the rated value of sealing seat and valve body. The rating on the nameplate should be understood. There are many sealing seat materials for this type of valve, and some sealing seat materials are rated less than the valve body rating. The overall rating of the valve body and the sealing seat also depends on the type, specification, sealing seat material, bolt material and stability of the valve. The operating conditions of the valve cannot exceed these ratings.
(2) Installation method of floating ball valve
① The valve is in the open position.
②The valve allows fluid to flow in from either side. To ensure a good installation, it must be installed in accordance with the actual conditions of standard pipeline transmission.
③Use flange bolts of corresponding specifications, and tighten the flange bolts according to the gasket manufacturer’s requirements.
④If there is leakage at the valve stem seal during installation, this is because the valve has undergone a large temperature change during transportation, and the seal can be restored by simply adjusting the packing as described in the “Maintenance” section.
(3) Maintenance method of floating ball valve
① Regular maintenance requires regular inspection to ensure that the valve is operating well. Daily maintenance includes tightening the gland bolts regularly to compensate for the wear of the valve stem seal.
②Overhaul includes replacement of sealing seat and packing. You can purchase a repair kit, and refer to the following “disassembly” and “assembly” methods for replacement.
③Maintenance spare parts package Standard maintenance spare parts package, including sealing seat, valve stem seal and PTFE gasket.
Floating ball valve disassembly principle diagram
(4) Schematic diagram of disassembly of floating ball valve
①Fix the right valve body flange of the ball valve downward on the workbench, and turn the valve stem to close the ball valve.
②Unscrew the connecting flange nut and take off the left valve body.
③Remove the ball from the inner cavity of the right valve (be careful not to bump the ball).
④ Take out the sealing seat from the left and right valve bodies.
⑤Remove the stem retaining ring and wrench.
⑥Unscrew the gland and two bolts, and remove the positioning block and gland.
⑦ Take out the valve stem from the inner cavity of the right valve.
③Take out 4 packings from the middle port (1 upper packing, 2 middle packing and 1 lower packing).
④Remove the gasket from the right valve body.
①Remove the thrust washer from the valve stem, and remove the upper bushing from the gland.
Check all parts for damage, bumps and corrosion, replace the gaskets and damaged, worn or corroded parts, and repair the damaged parts.
(5) Assembly schematic diagram of floating ball valve (as shown in the figure)
① All metal parts are cleaned with oil-free cleaning agent.
②Assemble the sealing seat on the right valve body and the left valve body.
③Put the thrust washer on the valve stem.
④Fix the right valve body flange down on the workbench, put the valve stem into the packing hole from the right valve body cavity, and then install a set of packing (4 in total).
⑤ Put the upper lining into the gland, put the gland into the middle port, and pre-tighten the two bolts.
⑥ Rotate the valve stem to make the flat body at the end of the valve stem consistent with the channel, and then align the groove on the ball with the flat body of the valve stem, and put the ball into the right valve body.
⑦ Put the gasket into the right valve body, install the left valve body, turn the valve stem to make the ball completely in the open position, and then pre-tighten the opposite nut on the connecting flange. Turn the valve stem to open and close the ball valve several times to make the ball in the open position, tighten all the nuts on the connecting flange, and then open and close the ball valve several times. It should be flexible and free from jamming during the opening and closing process. Install the valve stem on the positioning block, snap on the shaft retaining ring, and place the ball valve in a fully open or fully closed state.
(6) Maintenance and use of ball valve with actuator
① For the valve part, refer to the valve product instruction manual.
② For the actuator (electric, pneumatic and worm gear drive, etc.), refer to the instruction manual of the actuator.
(7) Common faults and troubleshooting methods of floating ball valves
① Leakage at the right and left valve body. Trim the sealing surface, remove dirt, replace the gasket, and tighten the nuts evenly and crosswise.
② Leakage of filler. Tighten the gland bolts or replace the packing (1 upper packing, 2 middle packing, 1 lower packing). Be careful not to trim the edges during installation, and tighten the gland bolts evenly.
③The valve stem is not flexible. Loosen the gland bolts, evenly loosen the left and right body connecting nuts or thicken the gasket to reduce the pre-tightening force, and be careful not to leak.
④ Seal leakage. Tighten the left and right connecting nuts evenly and crosswise to increase the pre-tightening force, or replace the sealing seat and gasket and clean the sealing groove.
⑤ When the ball valve cannot be screwed, do not put auxiliary levers or other tools on the wrench to harden it, which will damage the valve stem. If the operation is too strenuous, the reason must be analyzed. The closing parts of some valves are difficult to open due to thermal expansion. At this time, the gland bolts can be loosened, and the valve stem stress can be removed before opening. When the packing is too tight, the packing can be properly loosened.
⑥The ball valve can only be used for fully open or fully closed. Generally, it is not allowed for adjustment and throttling. The ball valve with a wrench is fully open when the wrench is parallel to the channel, and fully closed when it is turned 90°.
⑦Seal leakage. Tighten the left and right connecting nuts evenly and crosswise to increase the pre-tightening force, or replace the sealing seat and gasket and clean the sealing groove.


